Tired of the chaotic, soggy struggle of bathing your dog. Wrestling with a wet, slippery pup in a cramped tub is a chore for both of you. But what if you could transform that ordinary bathroom into a serene, efficient, and professional pet grooming at home studio. Imagine achieving a salon-quality wash and dry in the comfort of your own home, saving money and reducing stress for your canine companion. It's not a fantasy. With these five strategic steps, you can create the perfect environment for a successful, mess-controlled, and even enjoyable dog washing at home experience. Say goodbye to needing an extra pair of hands and hello to your new role as your dog's personal groomer.
🐾 Phase One: The Mindset and Preparation – Your Foundation for Success
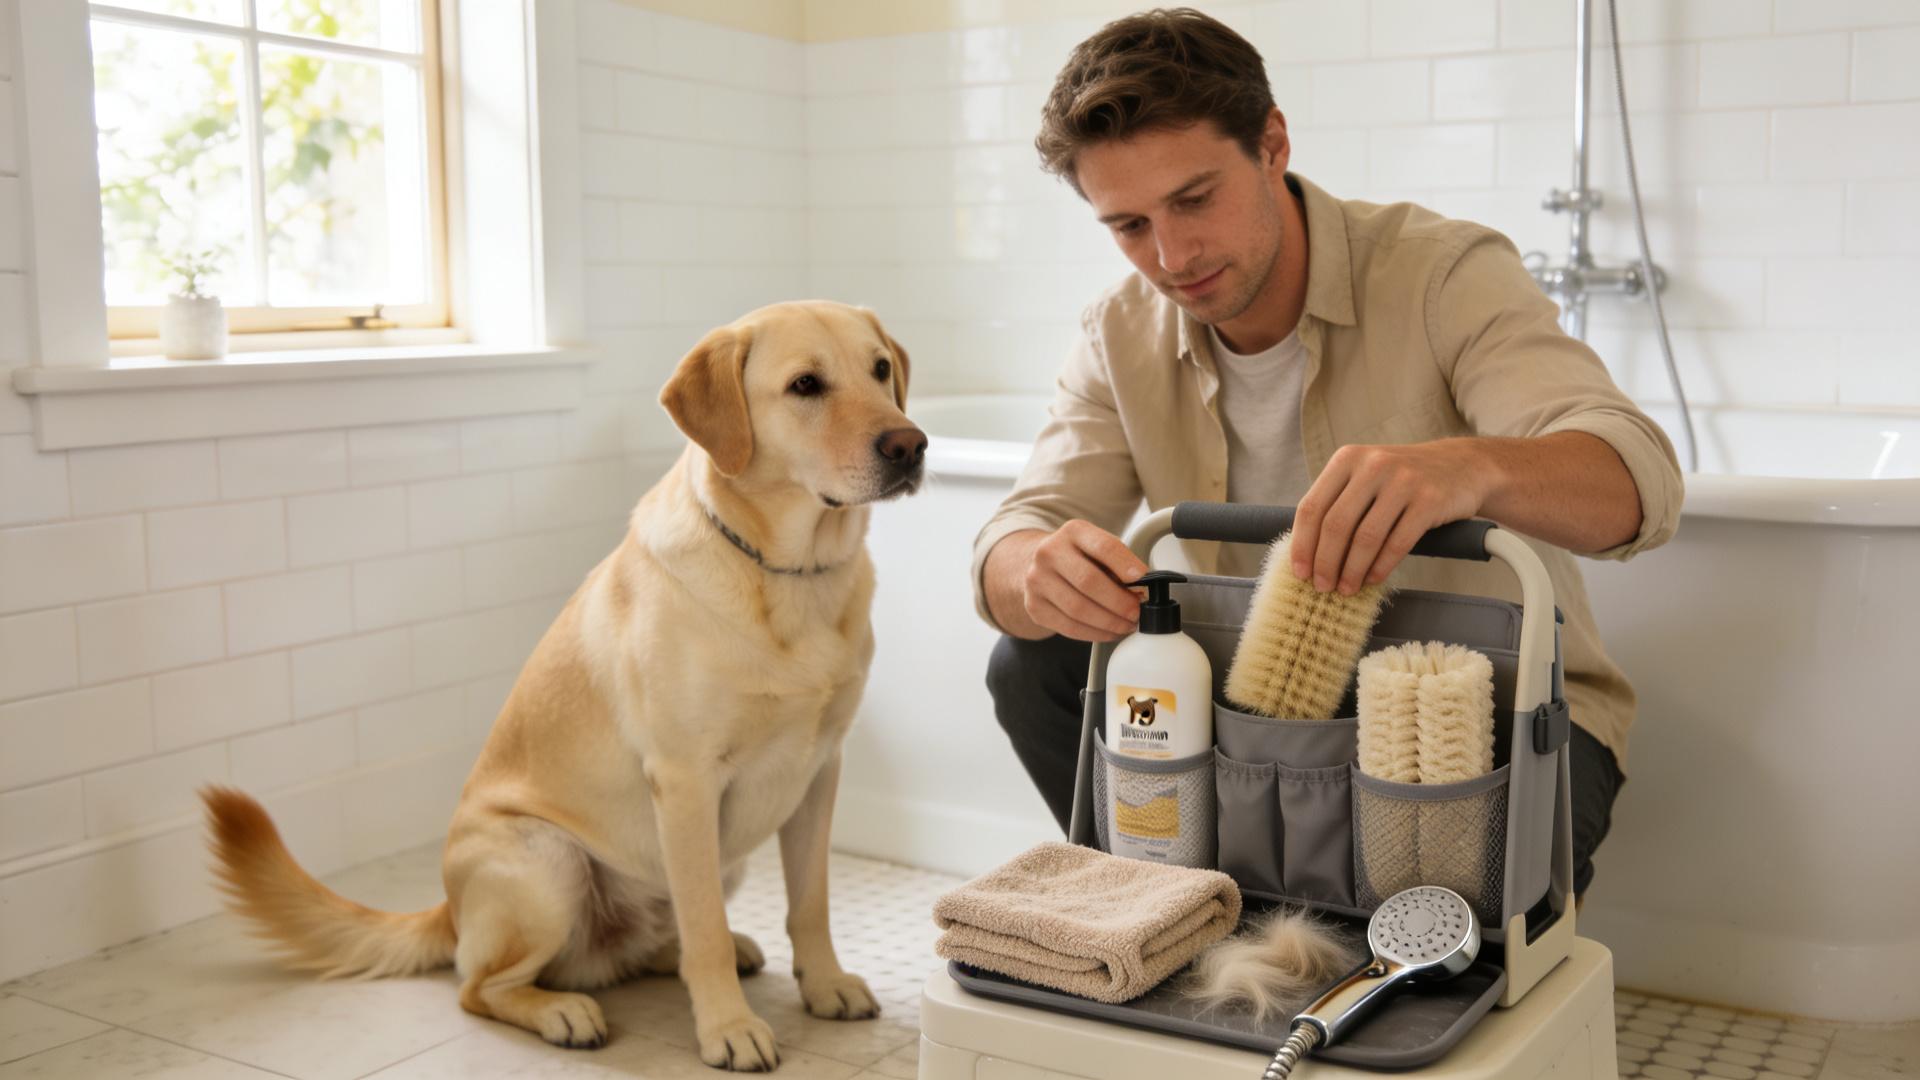
Before you touch a single bottle of shampoo, the most critical step is preparation. A professional groomer’s success hinges on organization and a calm, confident demeanor. Your dog will mirror your energy. If you are rushed and frazzled, they will be anxious. Approach this with patience and a plan, and you set the stage for a positive experience for everyone. Gathering every single supply you will need before bringing your dog into the bathroom is the golden rule that separates a messy ordeal from a streamlined procedure.
Your Professional-Grade Toolkit Checklist
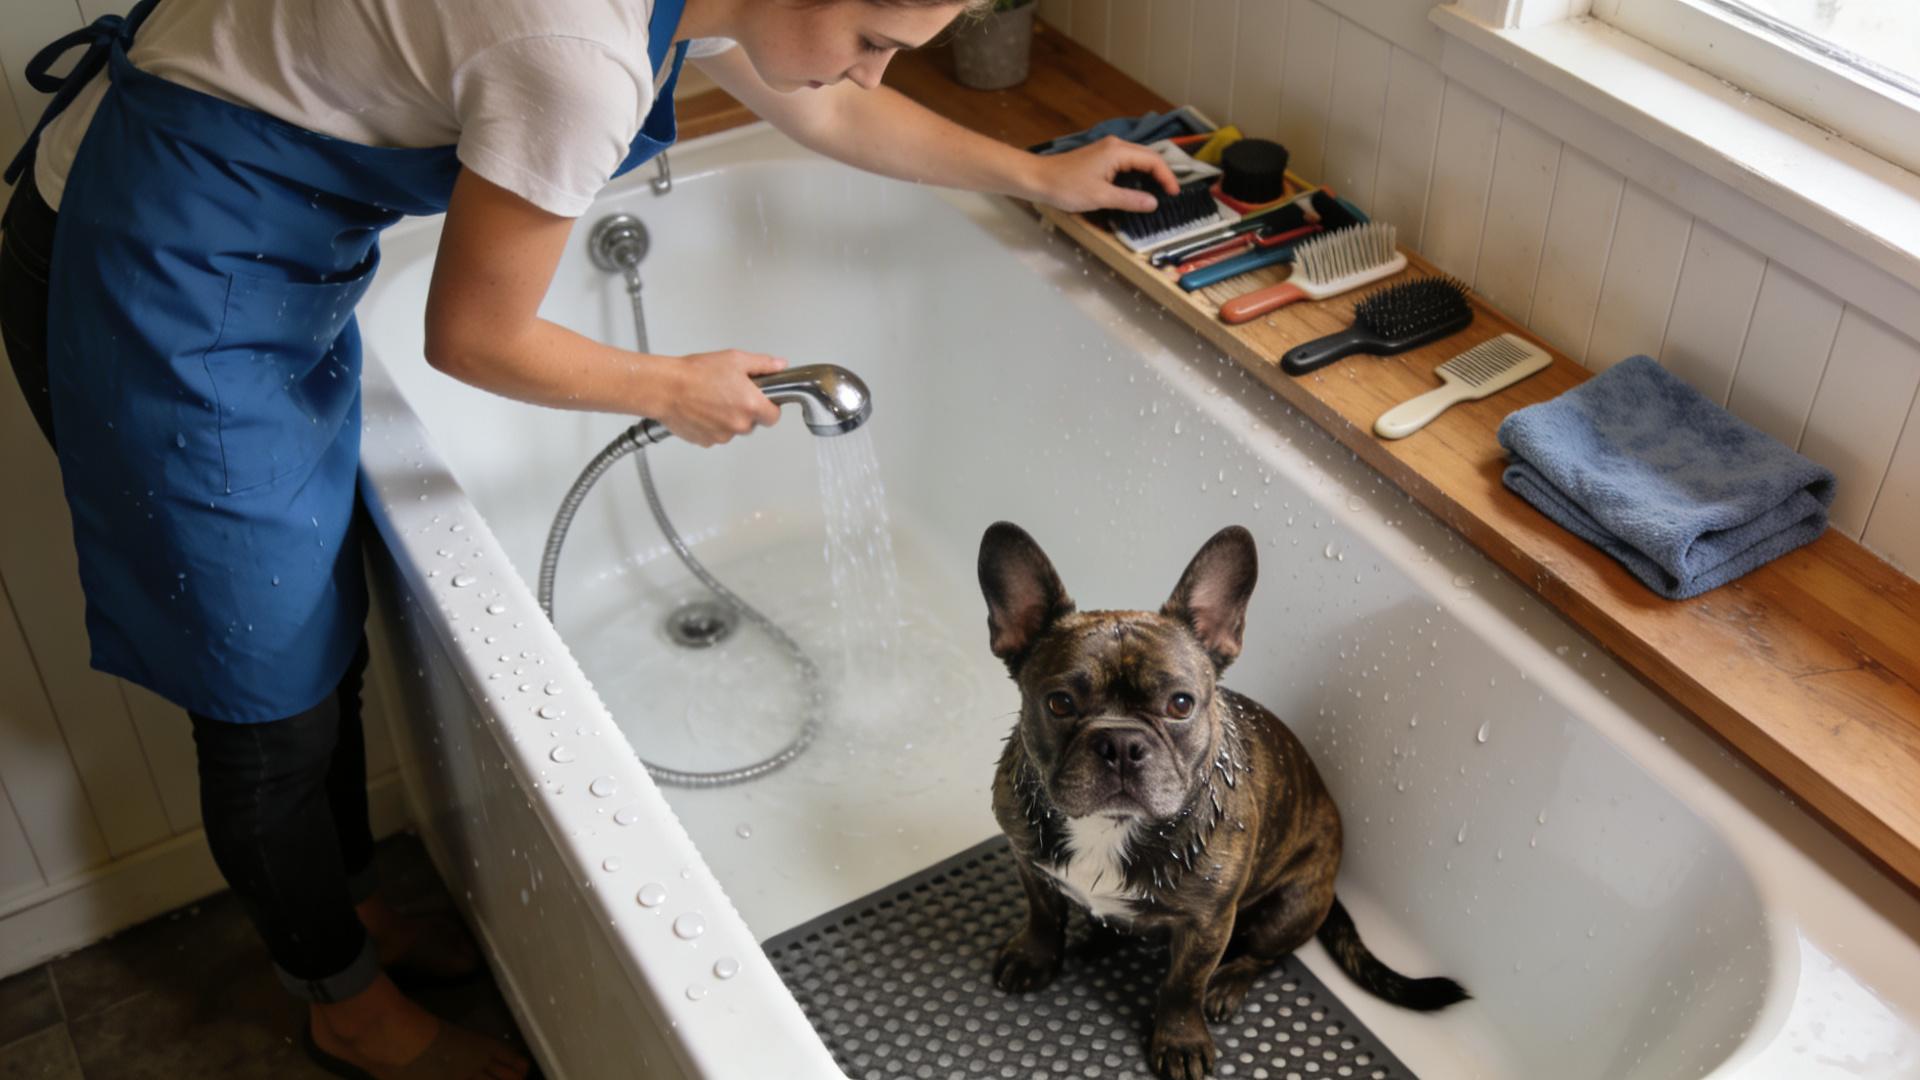
Assemble these essentials on a caddy or shelf within arm’s reach of your bathing area. Here is your non-negotiable checklist for a complete home grooming setup.
Safety and Containment. Non-slip rubber mat. Adjustable handheld showerhead with hose. Cotton balls. Pet-safe eye lubricant.
Cleaning and Care. Dog-specific shampoo and conditioner for their coat type. Detangling or deshedding spray. Ear cleaning solution. Canine toothbrush and toothpaste.
Drying and Finishing. Absorbent microfiber towels (3-4). High-velocity pet dryer or hair dryer with cool setting. Grooming brush and/or comb. Nail clippers or grinder. Styptic powder.

🚿 The 5 Core Steps to Bathroom Grooming Mastery
This is your actionable blueprint. Follow this logical sequence to move from a novice to a confident home groomer, capable of executing a professional dog wash at home every single time.
Step 1: Preparation and Safety – The Calm Before the Storm
This step is all about setting the physical and emotional stage. Begin by brushing your dog’s coat thoroughly to remove all loose fur, tangles, and debris. Bathing a matted coat will only tighten the mats, causing discomfort and making them impossible to brush out later. This is also the perfect time to perform a quick health check. Feel for any lumps, bumps, or skin irritations you may have missed.
Next, attend to the delicate areas. Place a cotton ball gently in each ear canal to prevent water from entering, which can lead to infections. Apply a drop of pet-safe eye lubricant to each eye to protect against shampoo irritation. Finally, ensure your pet grooming bathroom is ready. The non-slip mat should be securely in the tub, your toolkit organized, and the water temperature tested on your inner wrist—it should be lukewarm, not hot. This meticulous prep work signals to your dog that grooming is a predictable, gentle process.
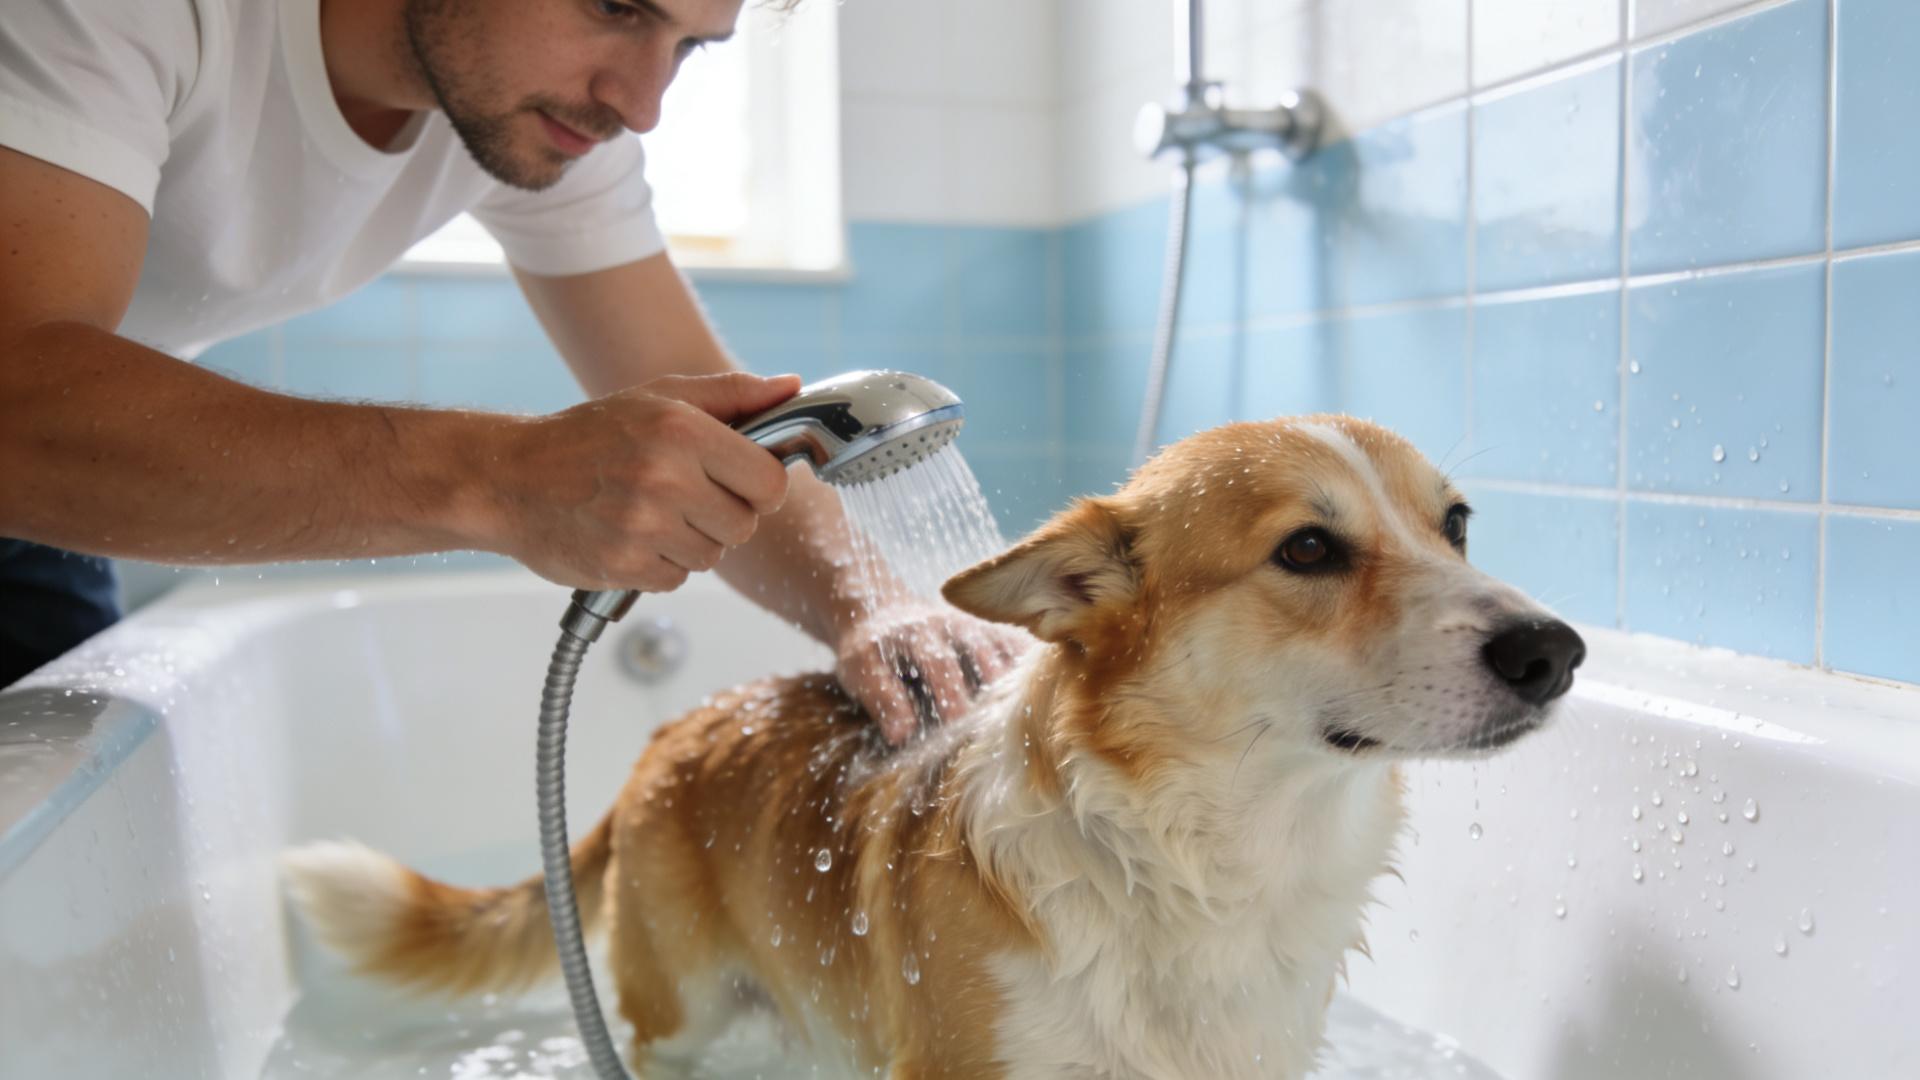
Step 2: The Bathing Process – Precision Lathering and Rinsing
Now, bring your dog into the prepared space. Using your handheld sprayer, thoroughly wet their coat from the neck down, avoiding the head initially. The why behind this is simple. most dogs tolerate a wet body better than a wet face, and starting calmly prevents immediate panic. Dilute your dog-specific shampoo as per instructions—concentrated shampoo is hard to rinse fully—and work it into a rich lather, massaging down to the skin.
Start at the neck and work your way back and down the legs, which follows the natural direction of hair growth. Wash the face last using only a damp, shampoo-free washcloth or a formula made specifically for canine faces. The pro’s secret to a truly clean, irritation-free coat is in the rinse. You must rinse for at least twice as long as you shampooed. Use the handheld sprayer to rinse from the bottom up, lifting the coat to ensure every layer is free of suds. Any residue left behind is a primary cause of itchy, flaky skin.
Step 3: Drying Techniques – Beyond the Towel Rub
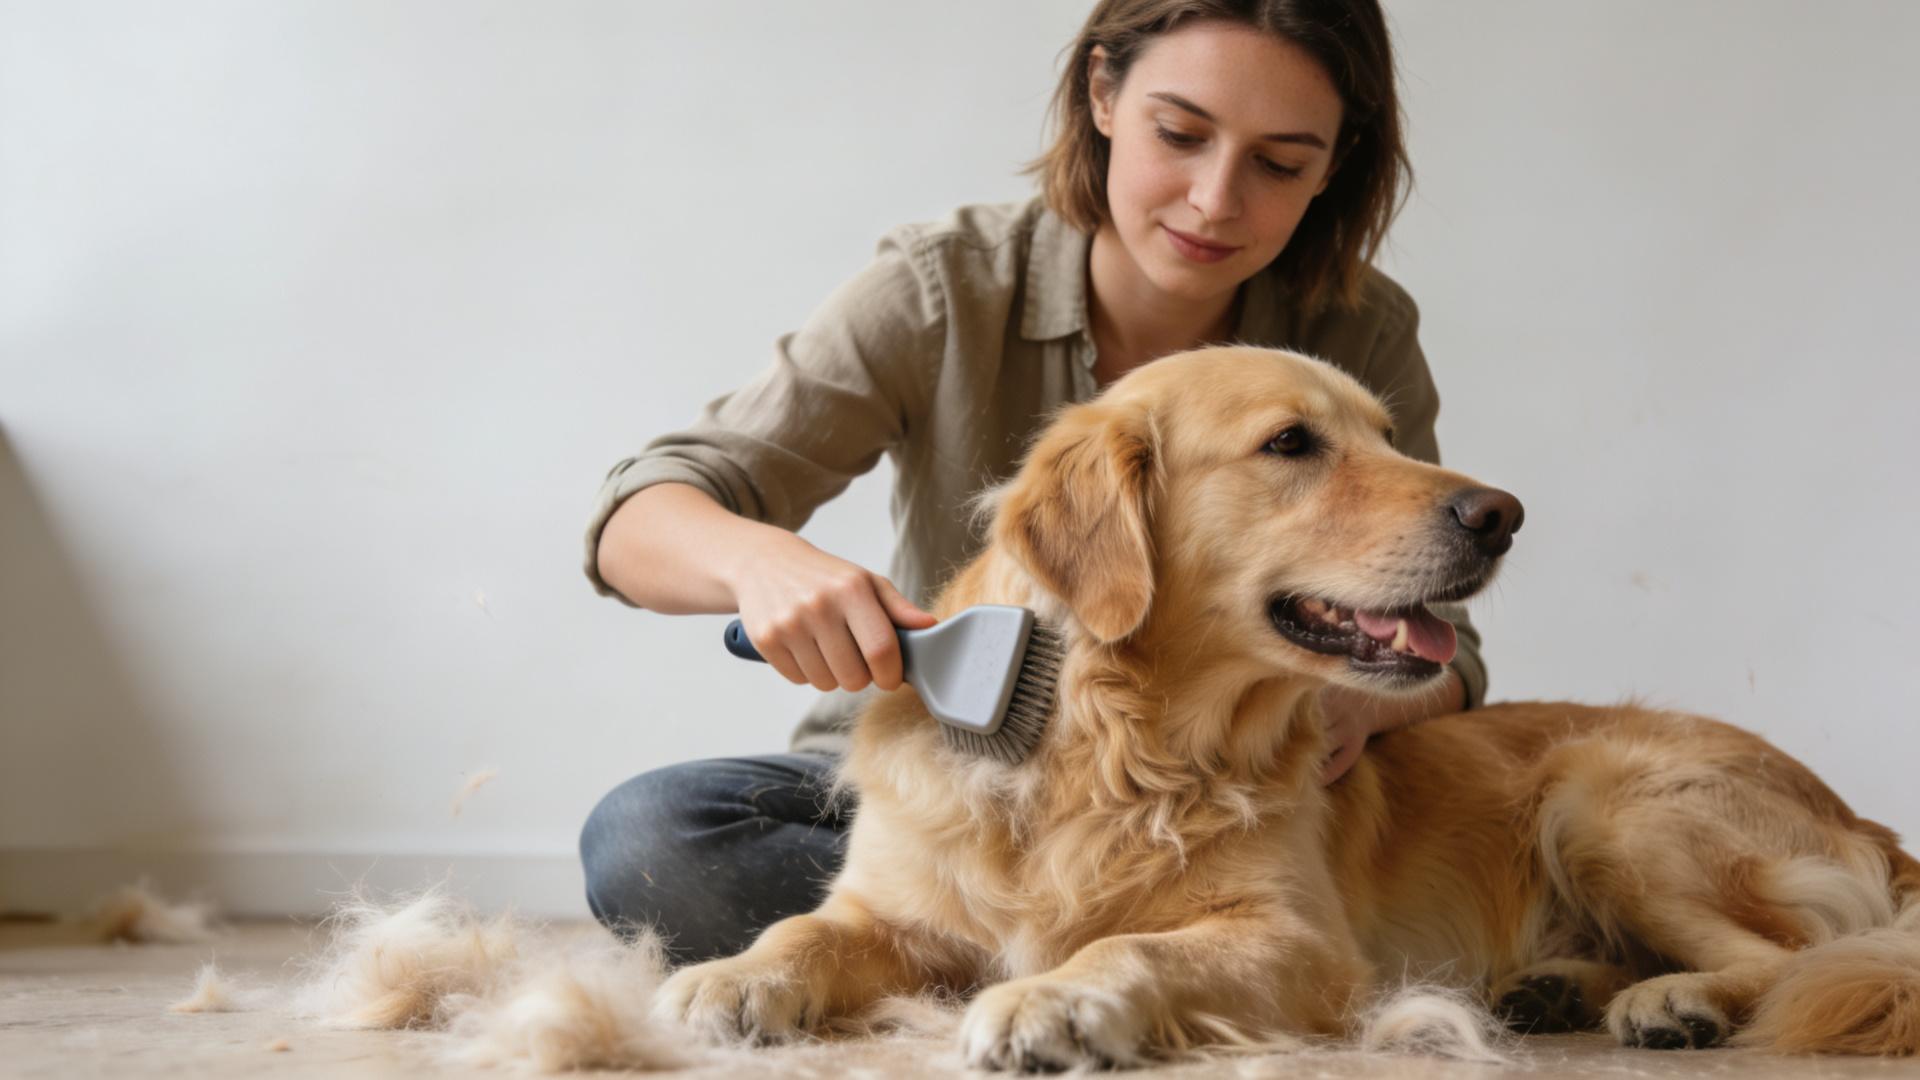
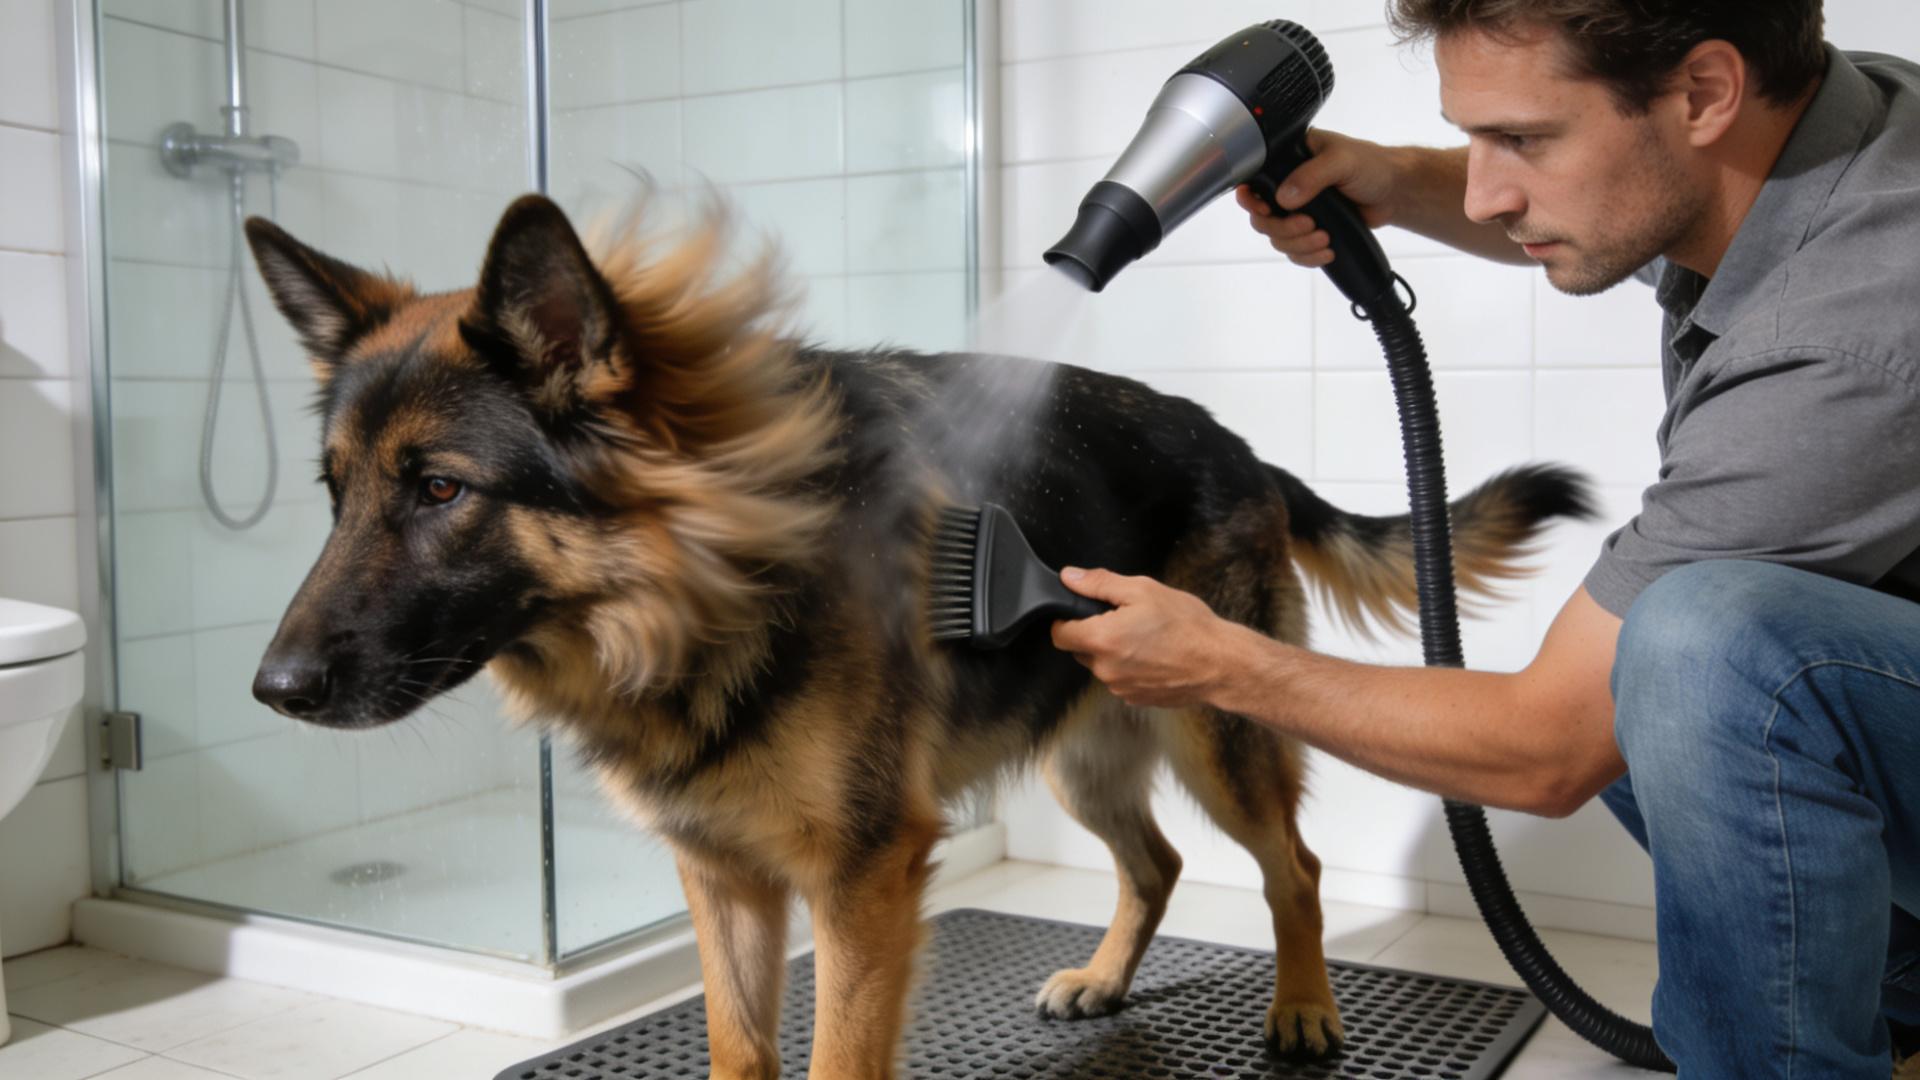
How you dry your dog is what creates that fluffy, salon-finished look. Immediately after the bath, squeeze the excess water from the coat with your hands. Then, use your microfiber towels to blot and press the fur. Vigorously rubbing a towel against the coat creates tangles and matting, especially in long-haired breeds.
This is where your investment in a blower or hairdryer with cool setting pays off. Introduce the dryer on its lowest setting, pointed away from your dog at first. Hold the nozzle at least 6-8 inches away and constantly move it. As your dog acclimates, use a brush to lift sections of hair as you blow the air through it. This "line brushing" technique ensures the undercoat is fully dried, preventing musty odors and hotspots, which are moist skin folds that can lead to infection.
Step 4: Post-Bath Care – The Finishing Touches
The bath is over, but the grooming service is not. While your dog is calm and the coat is dry, complete the full-service experience. Carefully remove the cotton balls from the ears. Using a cotton pad or gauze soaked in ear cleaner, wipe only the visible part of the inner ear flap. Never insert anything into the ear canal.
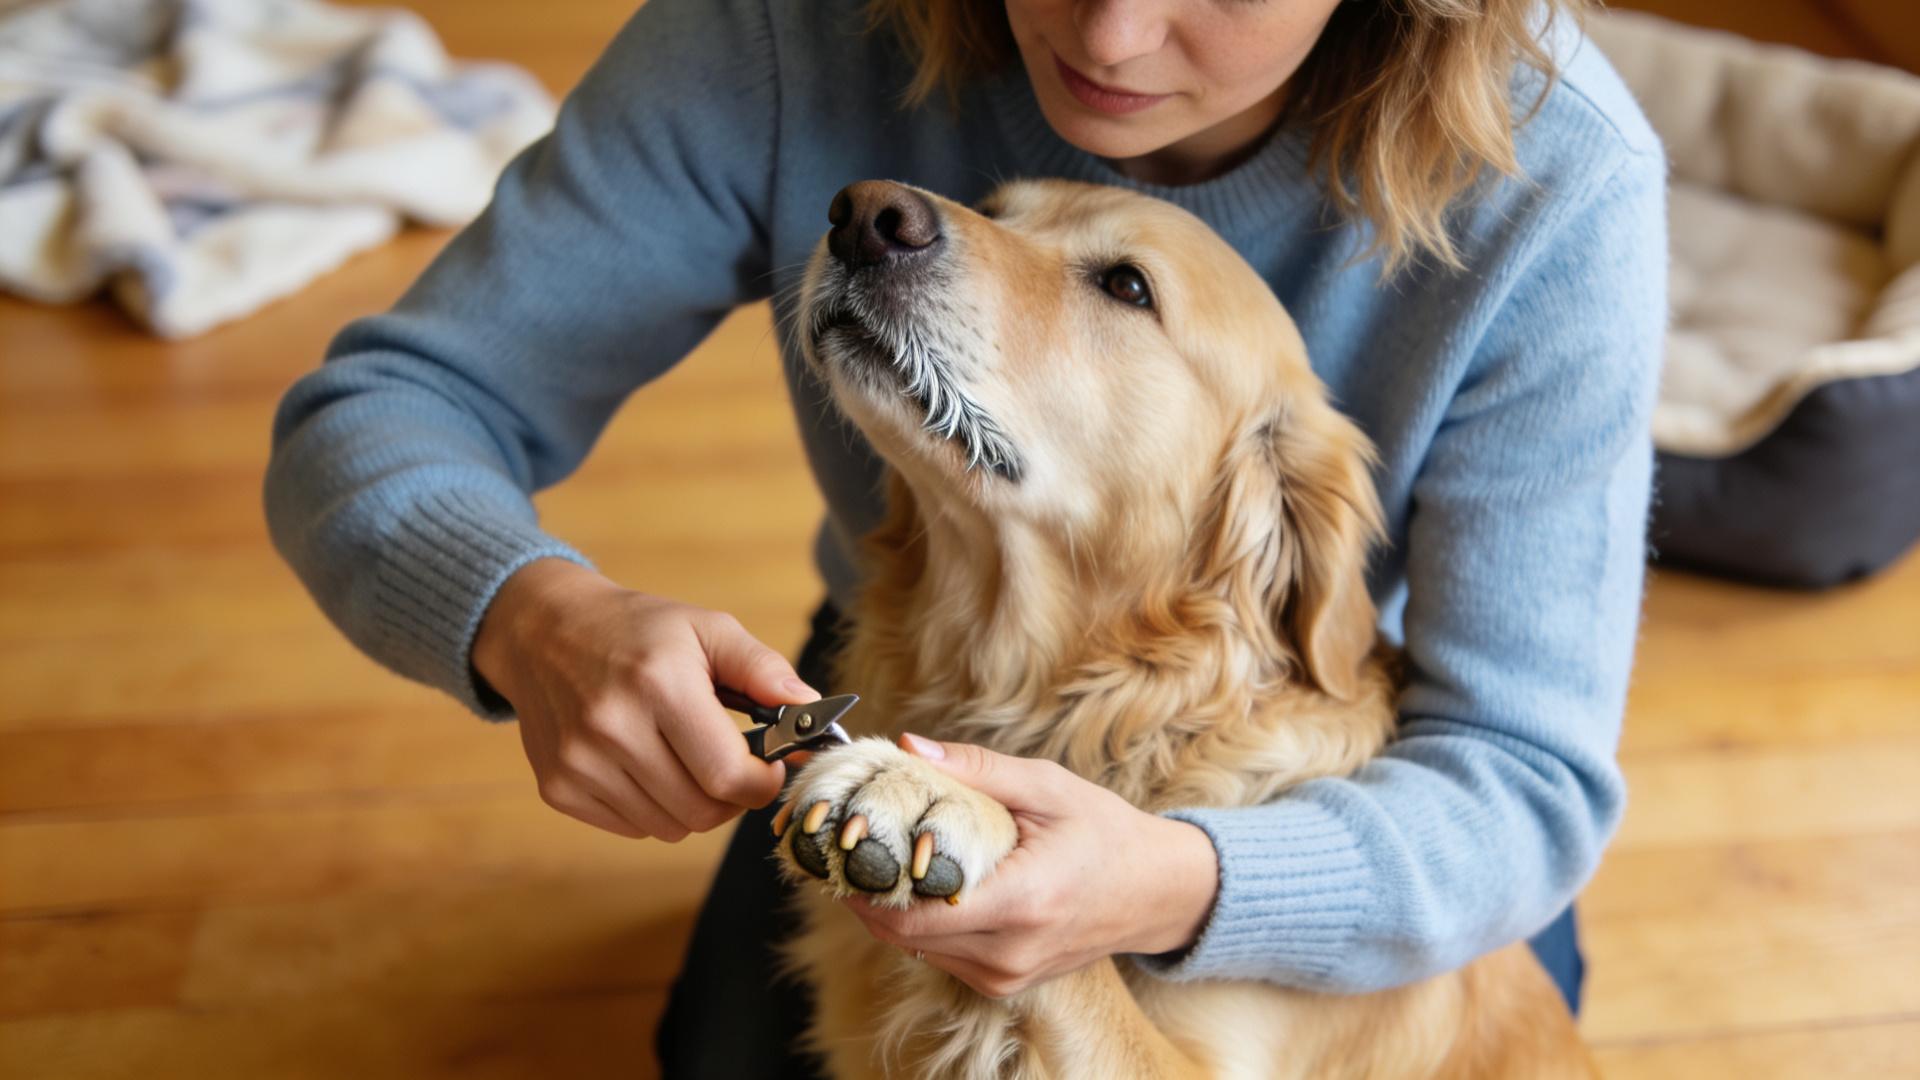
Next, trim the nails. Hold the paw firmly but gently and snip only the clear tip of the nail, avoiding the quick (the pink, blood-filled vein inside). If you are unsure, trim tiny amounts frequently. This is also an ideal time for dental care, offering a toothbrush with tasty canine toothpaste. These finishing touches not only complete the groom but also reinforce positive handling.
Step 5: Cleanup and Reset – Ready for Next Time
A true professional leaves their station ready for the next client. Rinse all tub surfaces of loose hair. Disinfect your tools. wash out brushes, empty and rinse the tub, and hang towels to dry. This final step is crucial for maintaining a hygienic dog grooming station and prolonging the life of your tools. It also provides a satisfying closure to the ritual, making the next DIY dog wash even easier to start.

🔧 Pro Tips and Advanced Techniques for Your Home Studio
You’ve mastered the fundamentals. Now, let’s refine your skills for specific challenges and coat types, seamlessly integrating solutions for common search queries.
For the Anxious Dog. The key is calming a dog during bath. Use a lick mat smeared with peanut butter stuck to the wall of the tub. Practice "dry runs" where your dog gets in the dry tub for treats. Keep your voice low and soothing, and never flood a fearful dog with water. Start at their feet and work up slowly.
For Heavy Shedders. Before the bath, use an undercoat rake or deshedding tool. Post-bath, while blow-drying, use the same tool to pull out the loosened undercoat. This is the most effective method for deshedding dog at home and will dramatically reduce fur around your house.
For Different Coat Types. Curly coats (Poodles, Bichons) should be brushed before drying, then dried completely with a blow-dryer and brush to prevent mats. Smooth coats (Labs, Beagles) benefit from a rubber curry brush during the bath to loosen dead hair. Double coats (Huskies, Shepherds) require thorough, line-brush drying to ensure the dense undercoat is completely dry.
🎉 Conclusion: Embrace Your New Role as Home Grooming Pro
Congratulations. Your bathroom has officially been upgraded to a certified canine care studio. By following these five steps, you have not just learned how to wash a dog in the bathroom easily. you have instituted a calm, effective, and bonding ritual. The benefits are immense. significant cost savings, reduced stress for your pet, the deep satisfaction of providing expert care, and the undeniable convenience of no more messy dog baths. You have the knowledge, the toolkit, and the space. The days of chaotic baths and calling for help are over.