A sudden yelp, a limp, or a telltale red smear on your floor—a split dog nail is a common yet distressing canine crisis. For any pet owner, witnessing this injury can trigger a wave of panic. However, your swift and knowledgeable action at home is often the most critical factor in preventing infection, alleviating pain, and ensuring a smooth recovery. This comprehensive guide transforms you from a concerned owner into a capable first-aid provider, walking you through every step of professional-grade emergency dog nail care from the comfort of your home.
🚨 Understanding the Urgency: Why Immediate Action is Crucial
A split nail, or onychoptosis, is more than a Grooming issue. It's an open wound that exposes sensitive tissue—the quick—to bacteria, dirt, and debris. The inner quick is rich in nerves and blood vessels, making this injury intensely painful for your dog. Left untreated, it can lead to:
- Infection: Bacteria can travel up the nail bed, potentially causing a localized infection (paronychia) or, in severe cases, a bone infection (osteomyelitis).
- Chronic Pain and Lameness: Your dog will alter its gait to avoid pressure on the paw, which can lead to secondary muscle or joint strain.
- Worsening of the Injury: A dangling nail fragment can catch on carpets or blankets, tearing the split further up the nail bed.
Your goal in this canine emergency nail trimming scenario is threefold: stop the pain, stop the bleeding, and prevent infection.
🔍 First Assessment: What Does a Split Nail Look Like?
Nails can split vertically (lengthwise, often more serious) or horizontally (across the nail). You might see a clear crack, a piece of the nail shell hanging off, or active bleeding from the nail tip or base. In dark-nailed dogs, a spurting or steady drip of blood is often the first visible sign.
🛠️ Step 1: Preparation is Your Secret Weapon
Before you touch your dog's paw, take a deep breath. Dogs are exceptionally perceptive to our emotions. Your calm demeanor is the first and most powerful tool in your kit. Gently secure your dog in a comfortable, well-lit area. For some dogs, sitting on your lap with their back to your stomach provides control and comfort. Have a second person to soothe and hold if needed.
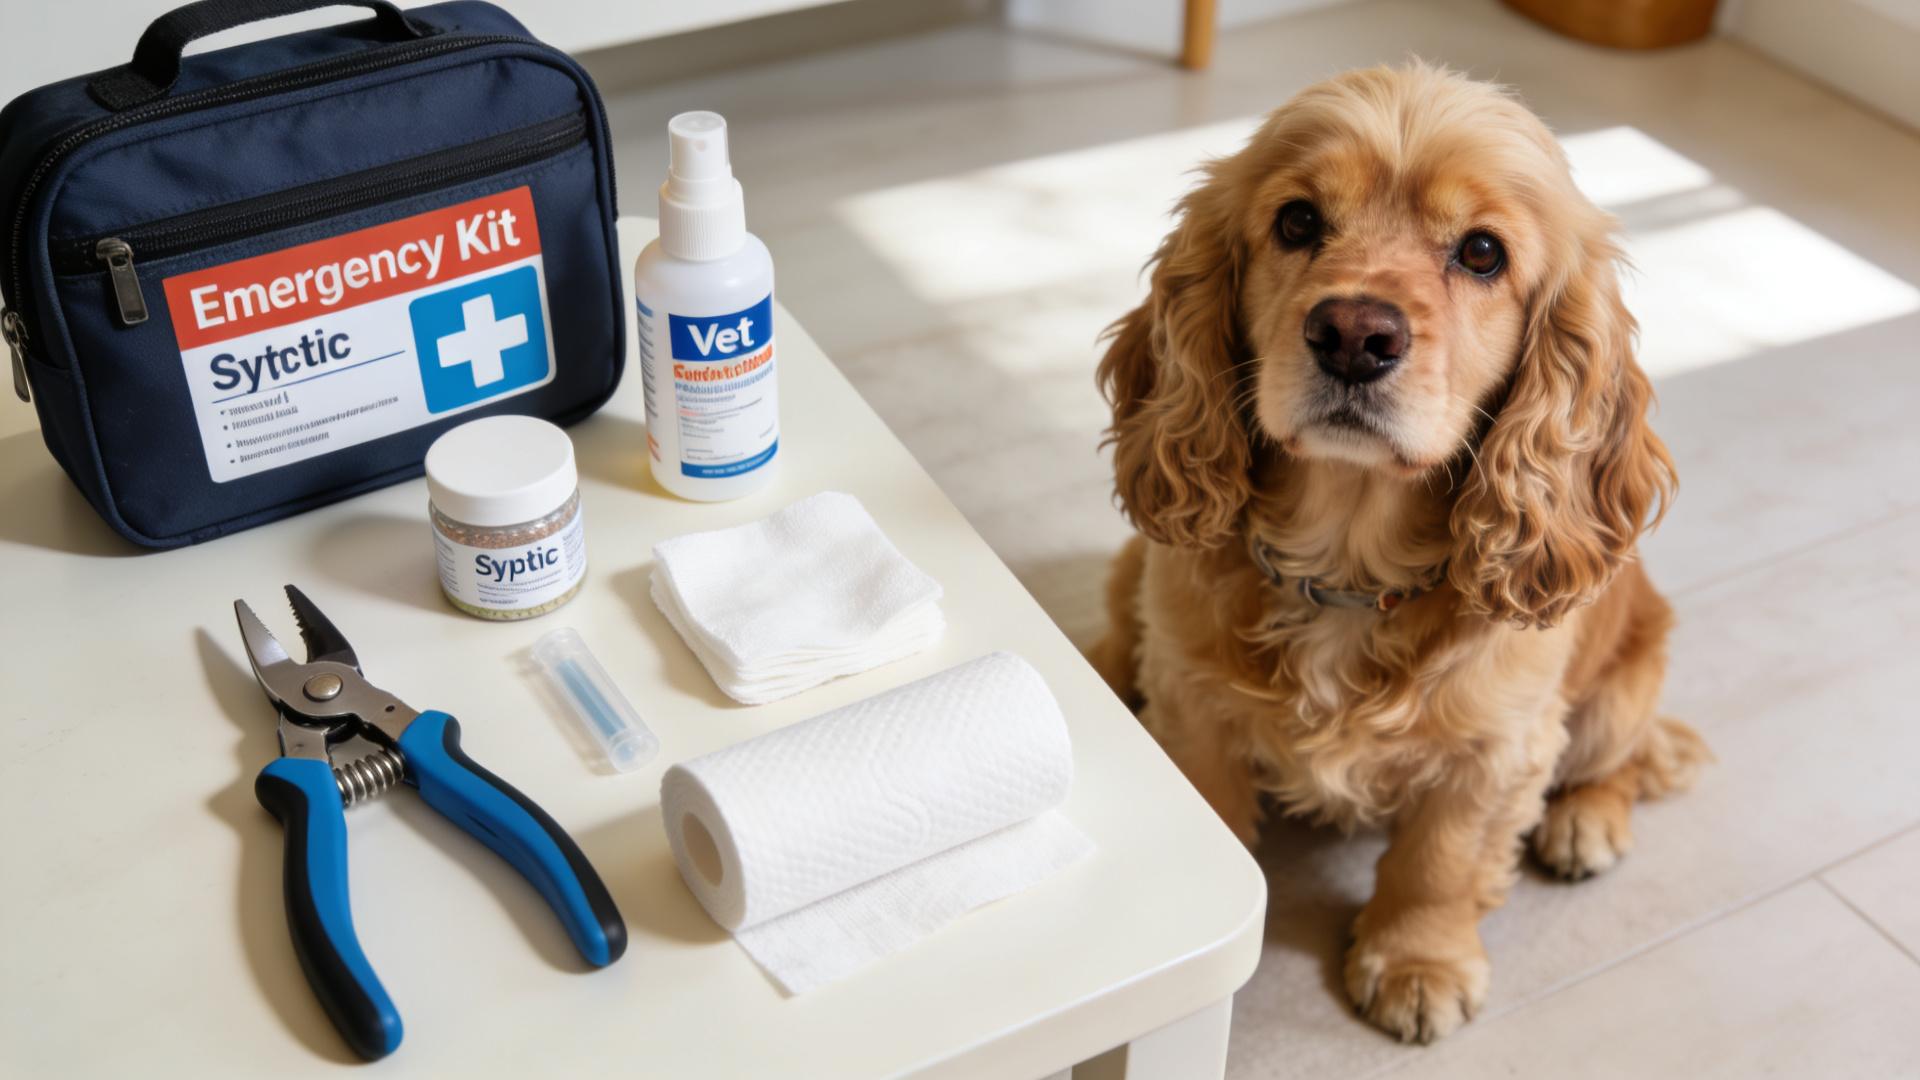
Your Emergency Dog Nail Repair Kit
Gather these supplies before you begin. Searching for items mid-process will increase stress for both of you:
- Sharp Dog Nail Clippers: Guillotine-style or scissor-style—use what you and your dog are familiar with. Dull clippers will crush the nail.
- Hemostatic Agent: Styptic powder (like Kwik Stop) is ideal. In a pinch, cornstarch or flour can work for minor bleeding.
- Clean Gauze Pads or Soft Cloth: For applying pressure and drying.
- Mild Antiseptic Solution: Vetericyn Plus® Paw & Wound Care or a diluted chlorhexidine solution (consult your vet for proper dilution). Special Reminder: Avoid hydrogen peroxide or rubbing alcohol, as they can damage healthy tissue and delay healing.
- Warm Water: In a bowl or with a clean spray bottle.
- Pet-Safe Antiseptic Ointment: Such as Vetericyn® Hydrogel or a triple antibiotic ointment without pain relievers (e.g., no hydrocortisone unless directed by a vet).
- Self-Adhesive Vet Wrap or Light Bandage Material: To protect the paw. Never use regular tape directly on fur or skin.
- High-Value Treats: For positive reinforcement throughout.
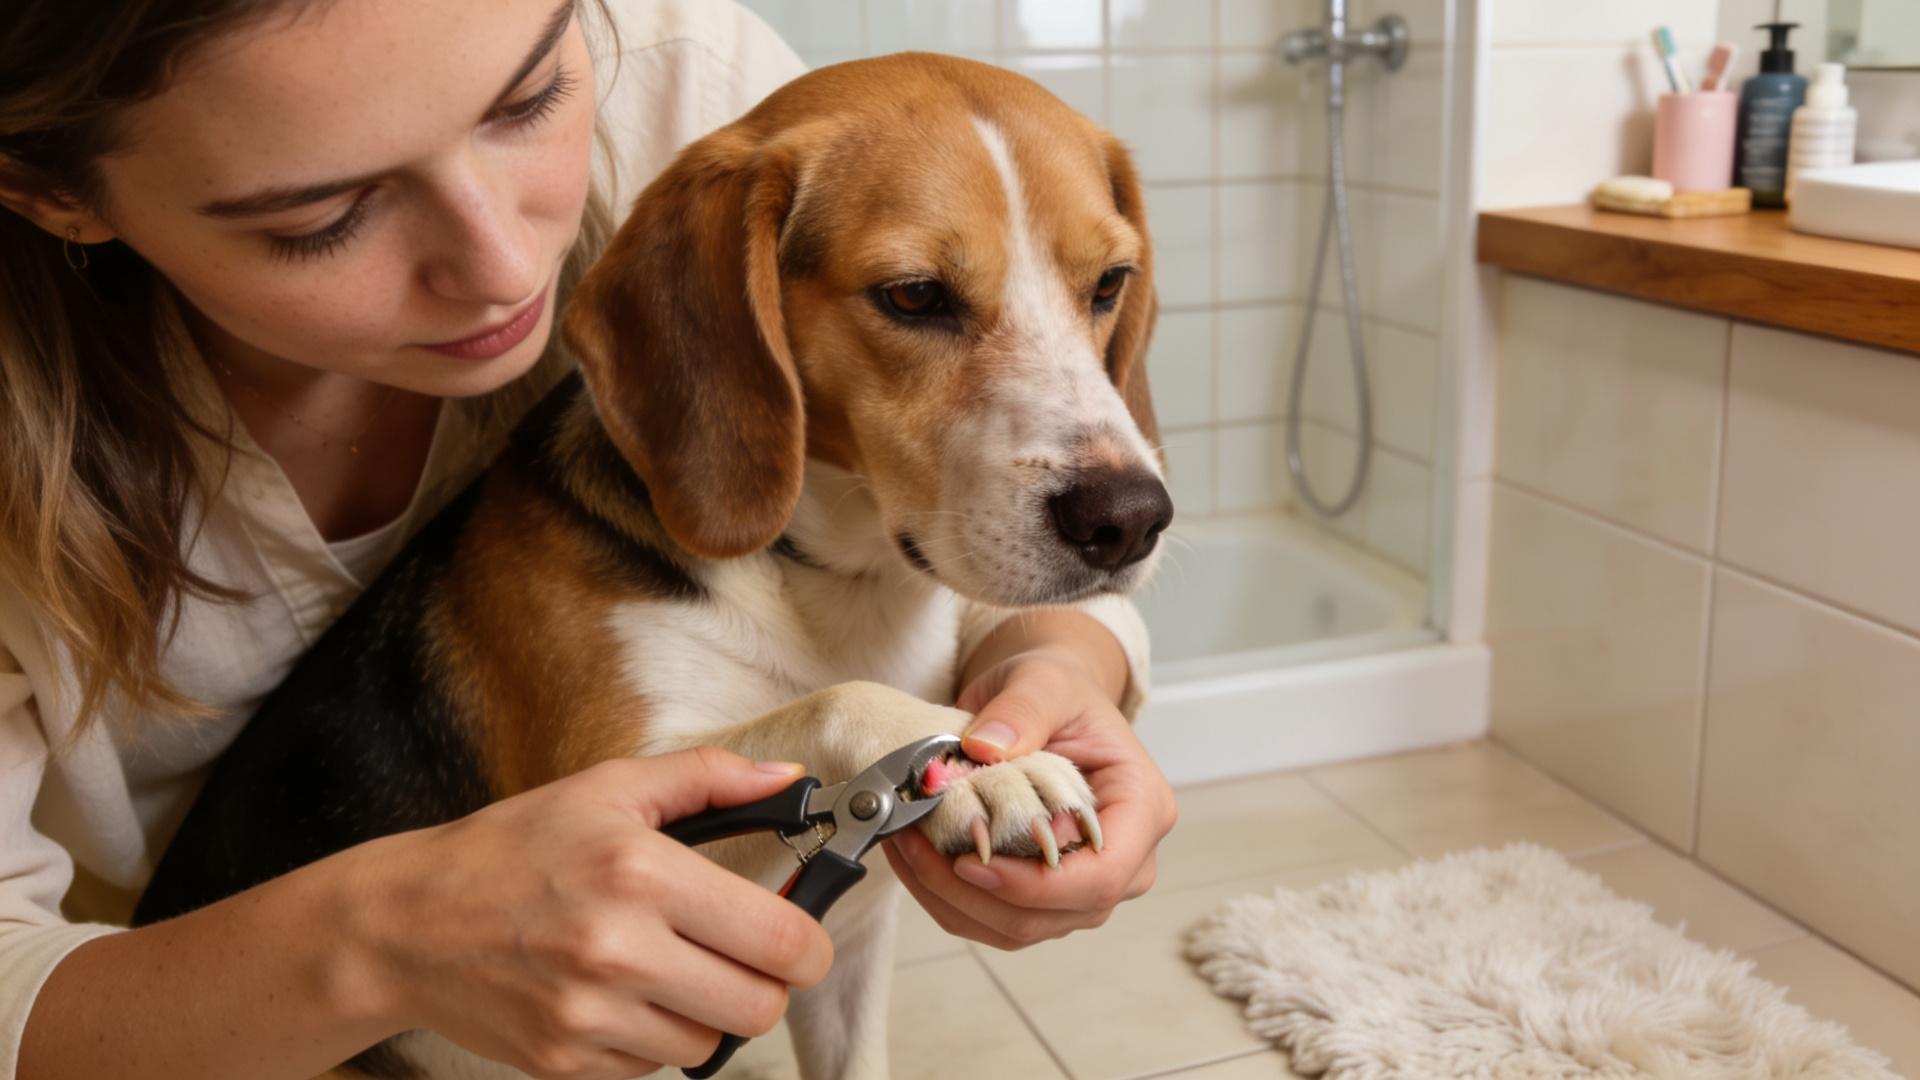
✂️ Step 2: The Trimming Procedure – Precision and Care
This stage focuses on trimming split dog nails at home safely to remove the damaged fragment and create a smooth edge.
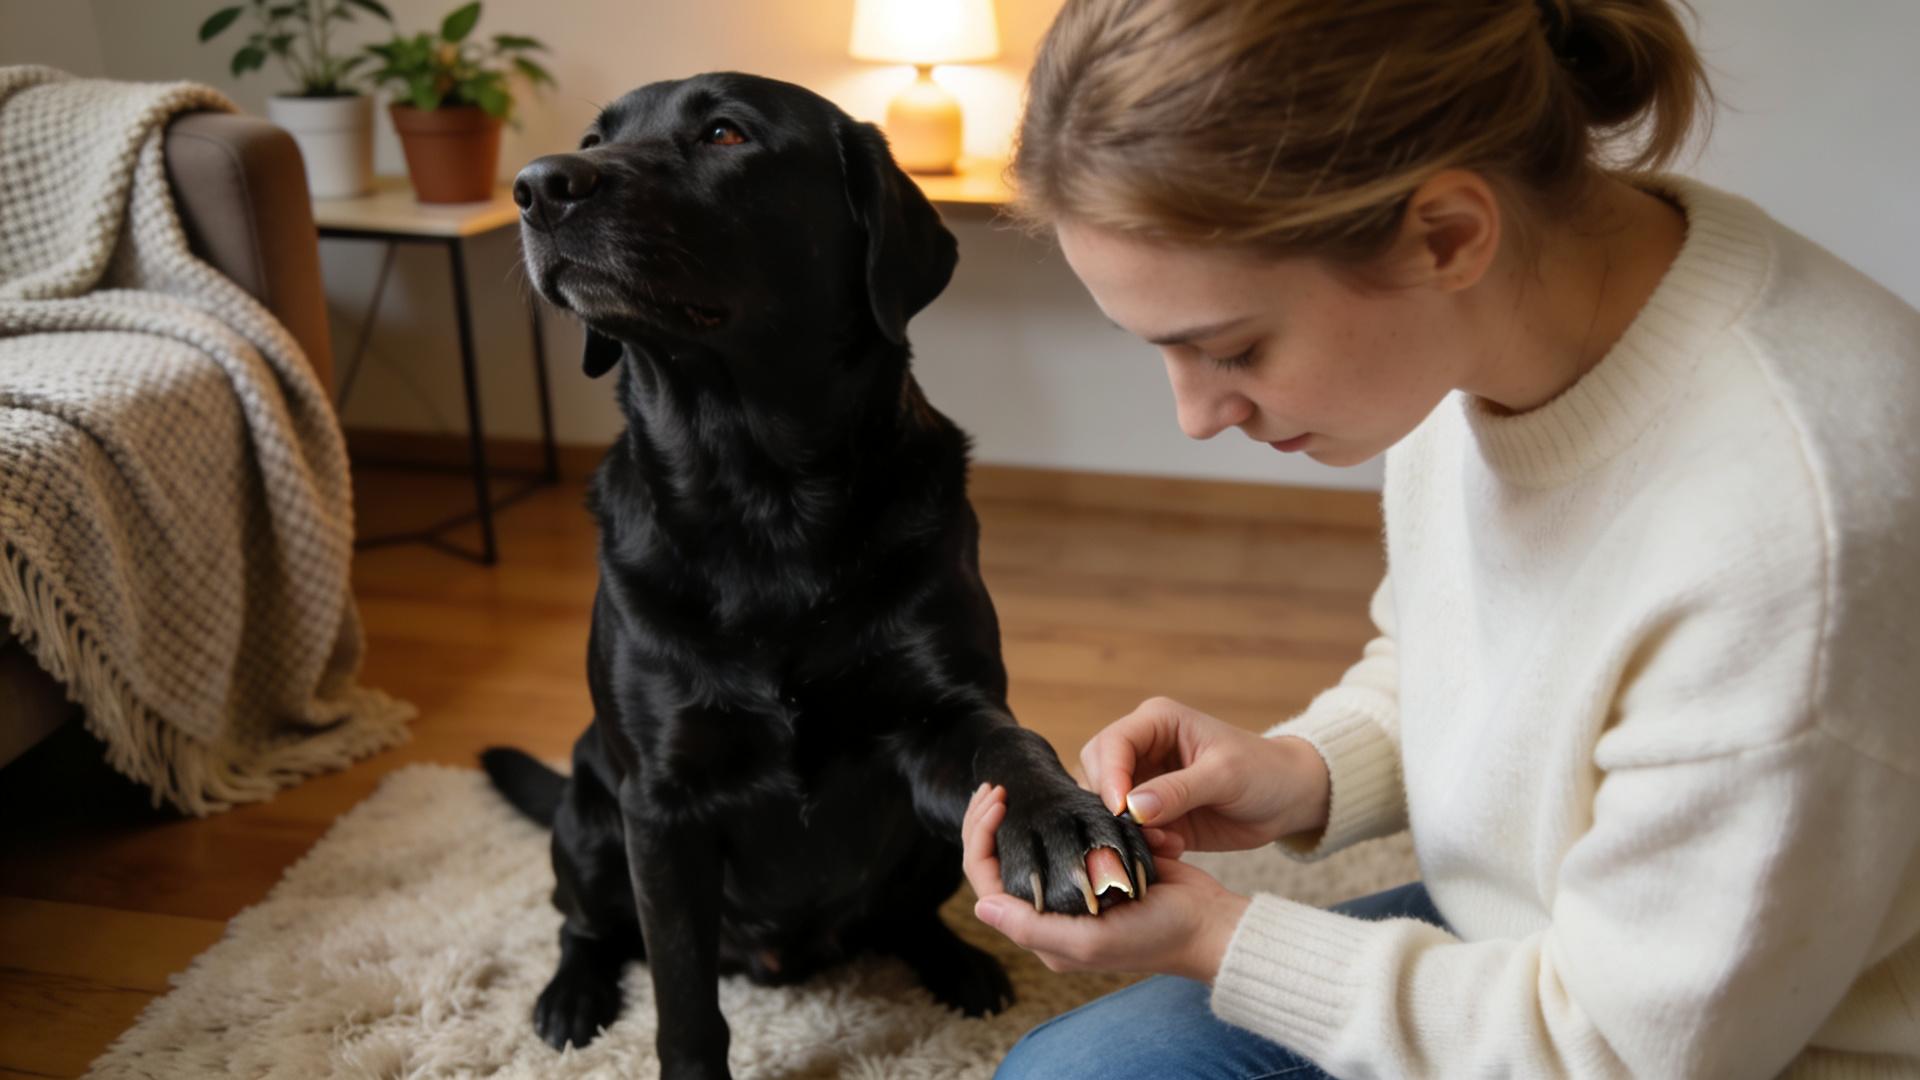
📍 Locate the Damage and the Quick
Under good light, carefully examine the nail. Identify the extent of the split and any loose pieces. In light-colored nails, the quick is the pinkish area. In black nails, it's trickier; look for a darker, sometimes grainy inner oval at the nail's base. The goal is to cut below the split but above the quick.
📏 Making the Clean Cut
- If a piece is dangling, stabilize the toe firmly but gently.
- Position your clippers to make one decisive, clean cut to remove the detached fragment. Hesitant, multiple snips can cause more pinching.
- Trim only the damaged portion. If the split goes very high, you may only be able to smooth the edges, not remove it entirely.
- If you accidentally cut the quick and cause bleeding, do not panic. Immediately apply styptic powder generously to the tip and hold with firm pressure on a gauze pad for at least 60-90 seconds. This is the most effective method for bleeding control from a split dog nail.
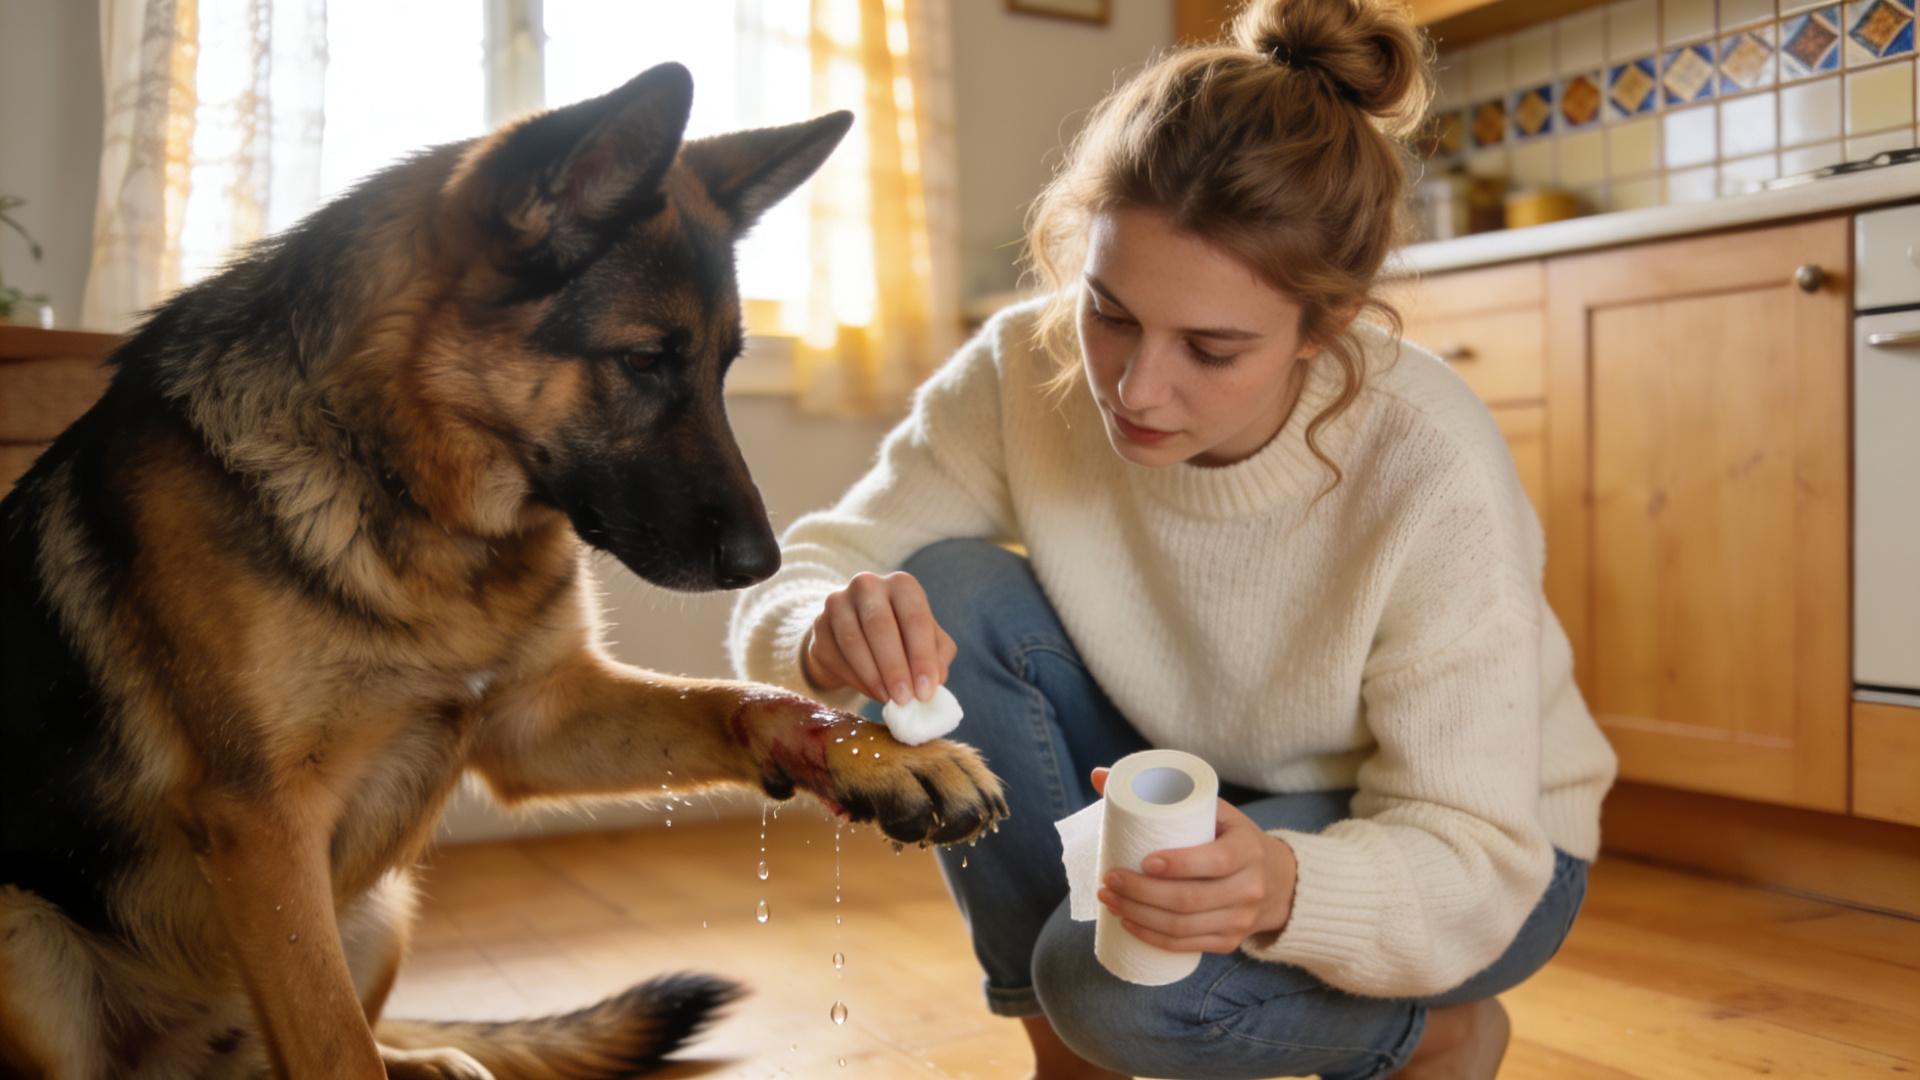
🧼 Step 3: Disinfection Procedures – Building a Barrier Against Infection
With the nail trimmed, the focus shifts to dog nail disinfection steps. This is non-negotiable for preventing complications.
- Gentle Cleansing: Soak a cotton pad in your prepared antiseptic solution or warm water with a drop of mild antiseptic soap. Gently wipe the entire toe, working around the nail bed. Avoid forcing solution into the open split.
- Thorough Rinsing: Use a fresh cotton pad soaked in clean warm water to wipe away any soapy or cleaning residue.
- Pat Dry: Use a clean, dry towel or gauze to pat the area completely dry. Moisture trapped under a bandage fosters bacterial growth.
- Apply Protective Ointment: Apply a thin layer of your pet-safe antiseptic ointment over the split and surrounding area.
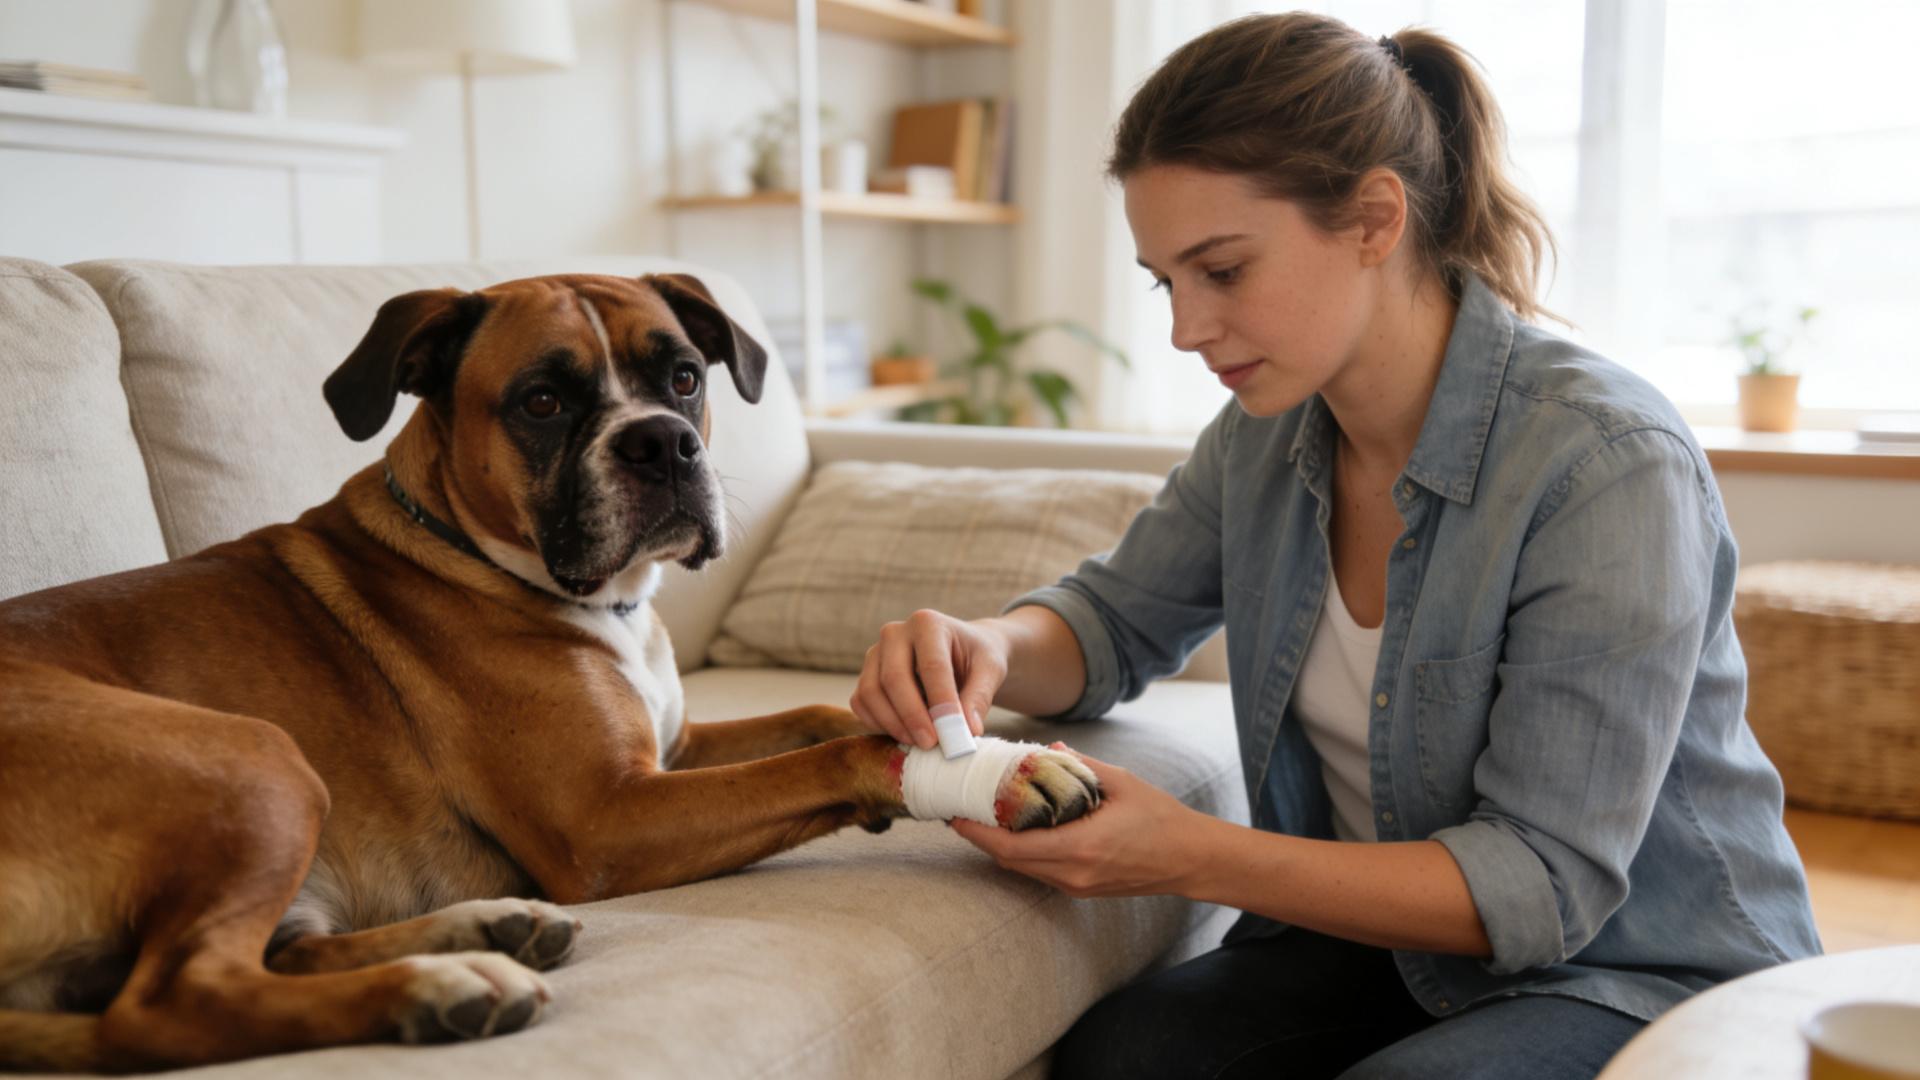
🩹 To Bandage or Not to Bandage?
A bandage can protect the wound from dirt and discourage licking. However, it must be done correctly:
Lightly wrap the paw with a non-stick pad over the nail, followed by a layer of cotton roll, and secure with self-adhesive vet wrap. Special Reminder: The wrap must be loose enough that you can easily slip two fingers underneath. Check toes frequently for swelling, coolness, or odor. Change the bandage at least once daily. If your dog won't tolerate a bandage or immediately tries to remove it, consider using a breathable sock or an Elizabethan collar as an alternative.
🔬 Step 4: Monitoring and Long-Term Prevention
Your role now shifts to vigilant nurse. Monitor the nail closely over the next 3-5 days. Contact your veterinarian immediately if you observe:
- Increased redness, heat, or swelling
- Pus or foul-smelling discharge
- Persistent or increased lameness after 24 hours
- Your dog is excessively licking or chewing the paw
- Loss of appetite or lethargy
🛡️ The Best Cure: Prevention Through Regular Maintenance
The most effective home remedy for split canine nails is to prevent them from happening. Implement a consistent nail care routine:
Trim Regularly: A general rule is that nails should not touch the ground when your dog is standing on a flat surface. For most dogs, this means trimming every 2-4 weeks.
Use the Right Tools: Keep clippers sharp. Consider a rotary grinder (Dremel) for smoothing edges, which can be less stressful and create a blunter tip that's less prone to catching.
Diet and Health: Ensure your dog's diet is balanced. Biotin and Omega-3 fatty acids can promote stronger nail and paw pad health. Sudden nail brittleness can sometimes indicate underlying liver or thyroid issues; consult your vet if splits become frequent.
By mastering these trimming and disinfecting split nail procedures, you empower yourself to handle a common pet emergency with confidence. Your swift, knowledgeable care directly translates to less pain, faster healing, and deeper trust between you and your canine companion.